Local Development
One of the key features of Nitric is the ability to run your application locally for development and testing, using an environment that closely resembles how the application would run in the cloud.
Using the nitric start command, you can start a local environment with local versions of the services/resources your application depends on. For example, Nitric can emulate API and websocket gateways, trigger scheduled services, and provide runtime APIs for queues, buckets, secrets, key/value stores, etc.
The start command runs your code without containerization, making it easier to debug and test your application locally. This is the recommended way to run your application during development. However, if you prefer to run your application in containers, you can use the nitric run command.
Running locally
nitric start
Once the command starts, you'll be presented with a list of running APIs and other services. You'll also see a link to the local development dashboard where you can view a live architecture diagram of your running application and interact with various services for testing.
Running locally in Containers
If you prefer to run your application in containers, you can use the nitric run command. This command builds and runs your application in Docker containers (one per service), along with any other services it depends on. This is useful for testing your application in an environment that closely resembles how it would run in the cloud.
However, running your application in containers can make it slightly harder attach debuggers and on operating systems like Windows and MacOS, the startup time can be slower due to the overhead of running the containers in a virtual machine.
nitric run
Enabling local HTTPS
By default, Nitric runs your application's APIs and HTTP Proxies over HTTP to avoid common issues with self-signed certificates. In most cases, this is sufficient for local development. However, if you need to test your application with HTTPS, the nitric start command supports enabling HTTPS using the --https-preview flag.
This command will generate a self-signed certificate and key for your application and use them to serve your application over HTTPS. Keep in mind that self-signed certificates are not trusted by browsers and may cause security warnings.
nitric start --https-preview
If you need to use a custom certificate and key, you can place them in the .nitric/tls directory in your project and Nitric will use them to serve your application over HTTPS. The files must be named cert.pem and key.pem respectively.
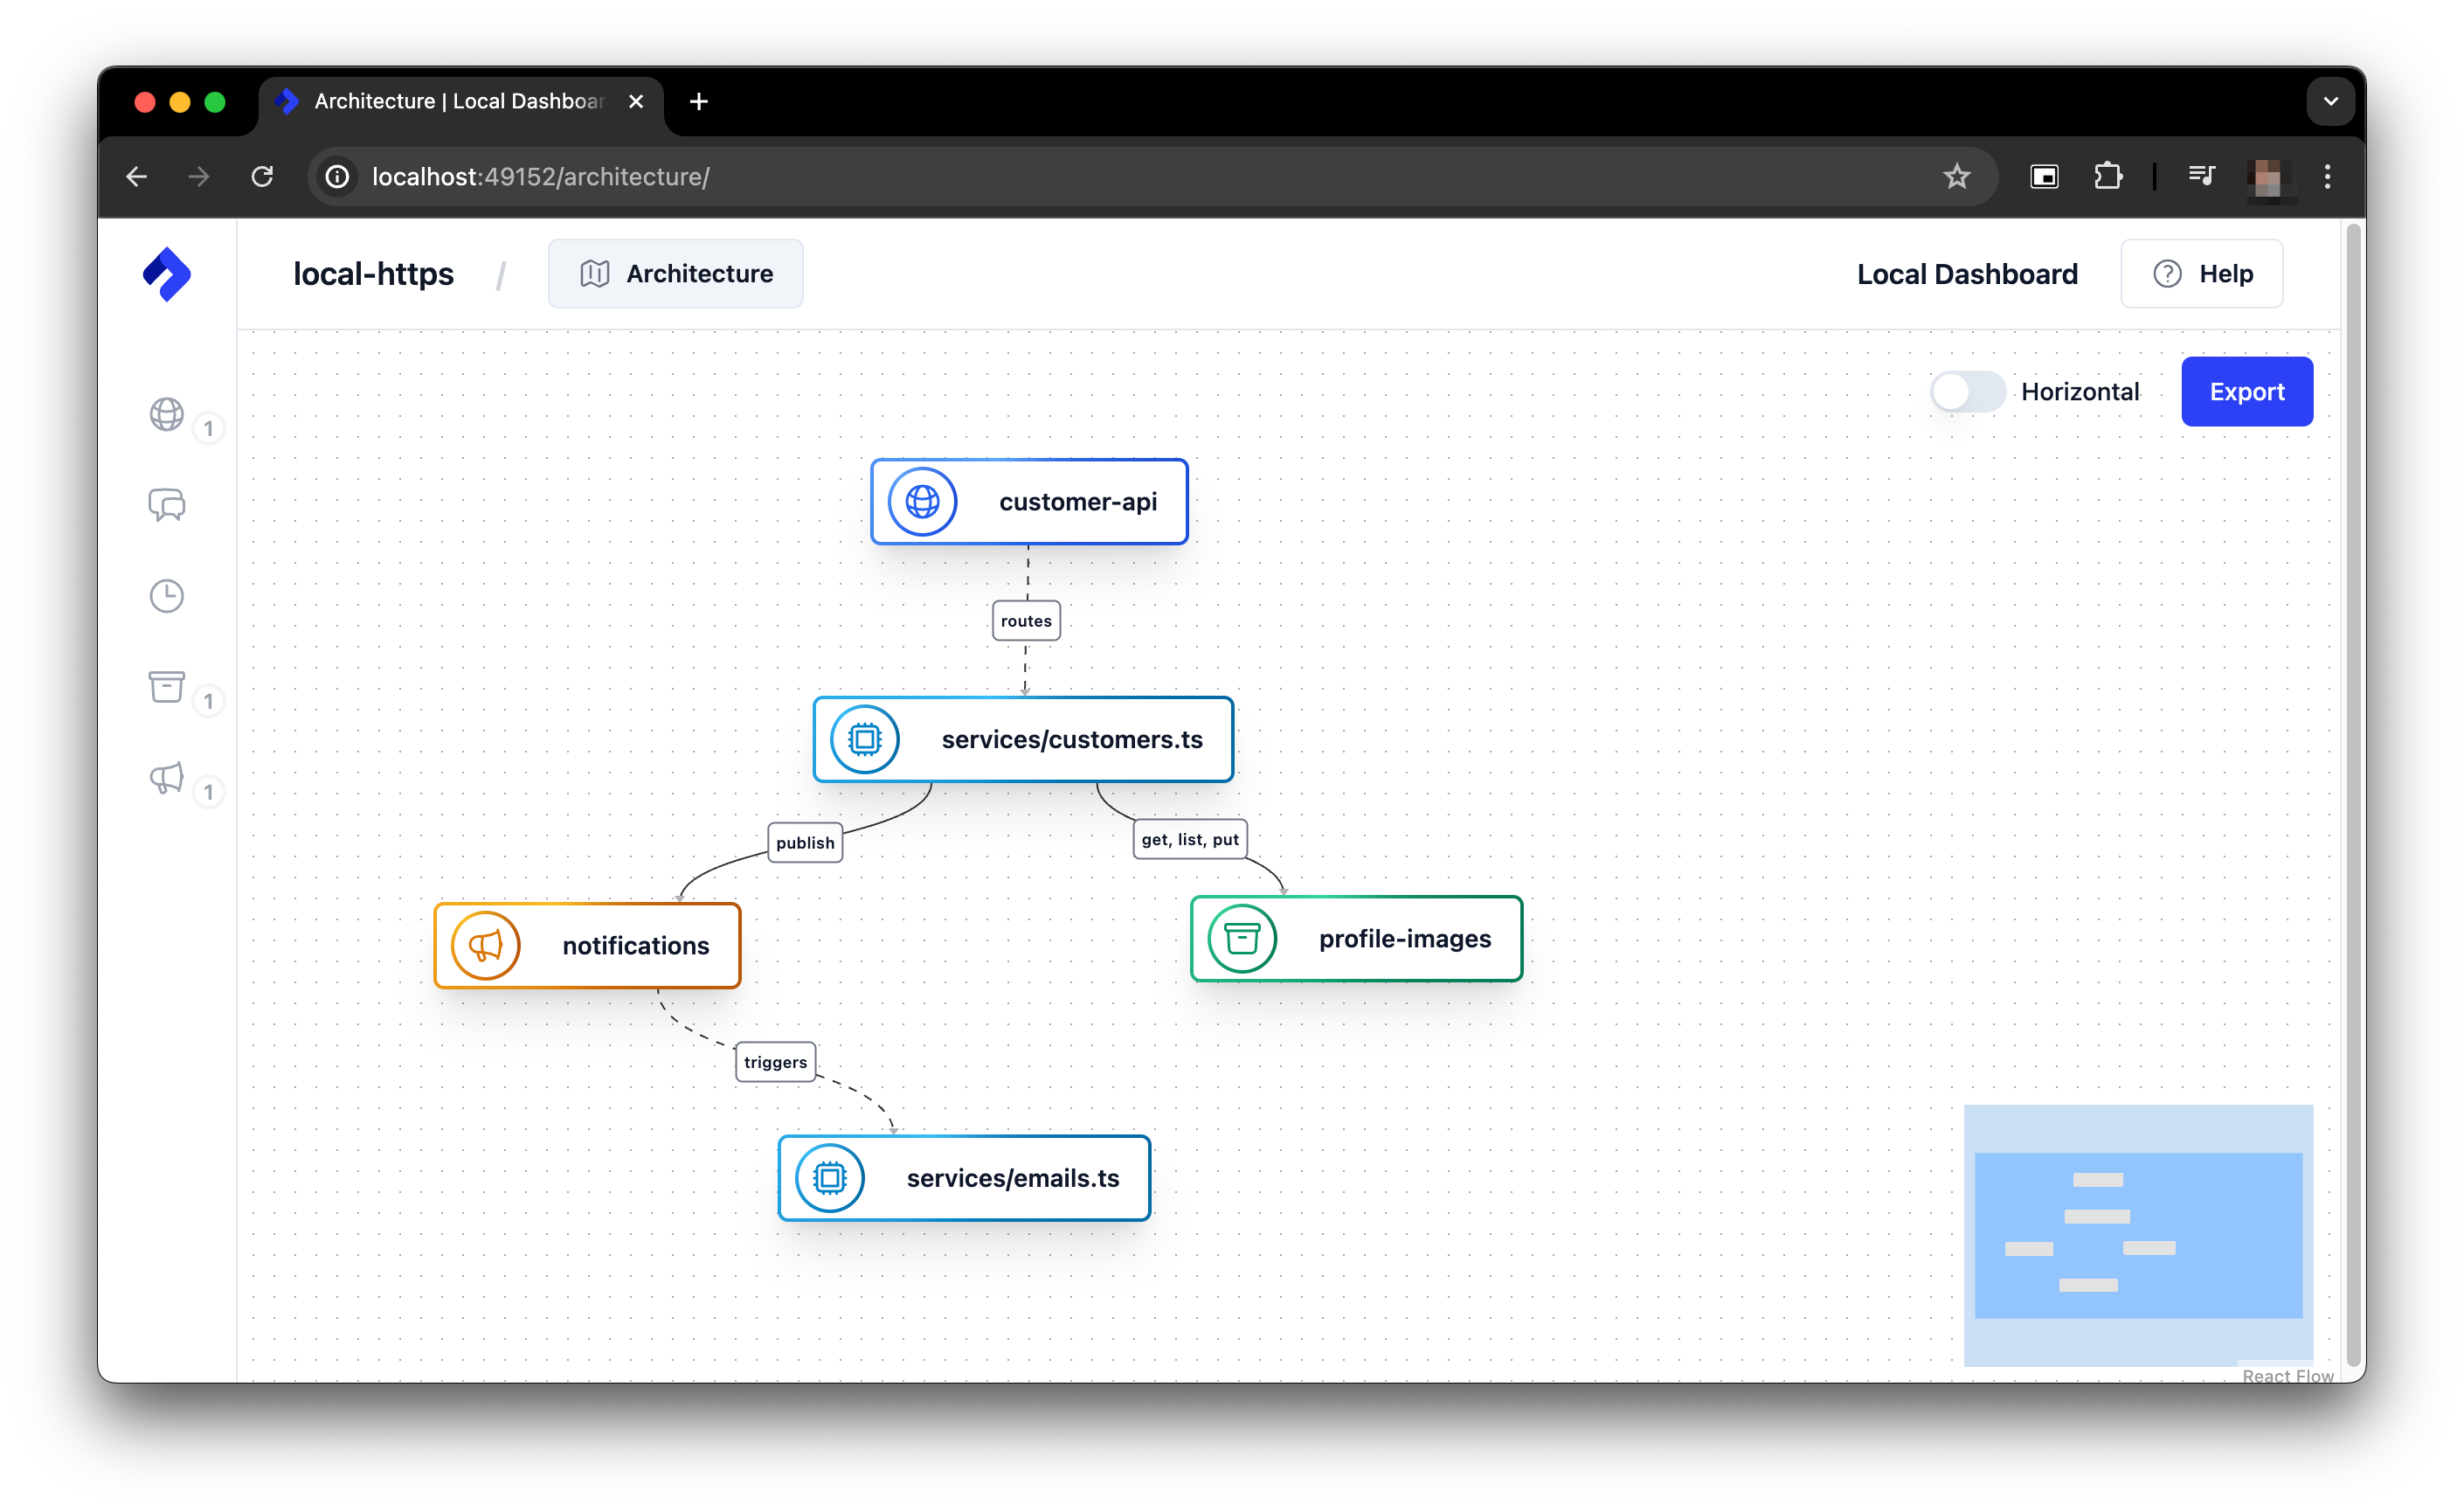
Local Dashboard
The Nitric CLI also hosts a Local Development Dashboard, which provides a graphical interface for interacting with your application during development. The dashboard includes the following features:
- Architecture: An automatic architecture visualization of your application, including all services, resources and their connections.
- API Explorer: An automatic HTTP client for testing your APIs.
- Batch jobs: Observe batch service jobs and submit tasks.
- Databases: View your SQL databases and interact with them using SQL queries. This screen can also be used to trigger database migrations.
- Schedules: Trigger and observe scheduled tasks.
- Storage: View your applications buckets and interact with them, including uploading and downloading files.
- Topics: View topics and subscriptions, and publish messages to topics.
- Secrets: View and manage your application secrets.
- WebSockets: Dive deep into connection details, connecting, and sending messages.
Many of these features make it possible to build and testing modules of your application in isolation. For example, you can could create and test a topic and subscriber without needing to first write the publisher.
All features provide real-time updates, ensuring you stay in sync with your application changes.
To access the Development Dashboard open the local URL in your browser. By default, the URL is set to http://localhost:49152.